Showing posts with label Tutorial. Show all posts

Wednesday, September 10, 2014

Home Made "Spaghetti O's"

Home Made "Spaghetti O's"

Or Alphabet Soup...


My kids had never had spaghetti O's before.  It was a thing from my past that I always liked when I got it as a "treat".  It was definitely not the normal fare at our house either.  I recently came across a recipe that was billed as tomato alphabet soup.  I decided to try it out - and it tasted really close to spaghetti O's.  Added a few of my own special touches and my kids loved it - and keep asking for it.  Time to share my tweaked recipe.

Ingredients:

Small Pasta Shapes (alphabet letters, O's, small shells, elbows, etc) - I usually use 1/2 lb of pasta, today I used a whole pound.
Garlic Powder - 1 tsp - to taste
Dried Minced Onion - 1 Tbsp - to taste
Basil - tsp or so - to taste
Oregano - tsp or so - to taste
Black Pepper - few turns of a grinder to taste
dash of salt
1 can Tomato Sauce (15oz)
4 - 6 cups chicken broth (or bouillon and water)
Shredded cheese for serving

Optional:
Make mini spoon-sized meat balls and cook in the soup until cooked through for an extra boost of protein.

Directions:
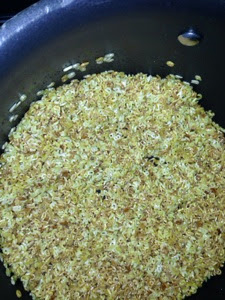
Get out a heavy bottomed sauce pan and heat on medium.  Add in the olive oil until it's shimmery and then add the dry pasta - yes, dry.  Toast it in the hot oil until it's nicely browned all over.

It's kind of like starting to make a rice pilaf.

Once the pasta is nice and toasted, add in the seasonings - garlic, onion, basil, oregano, pepper and salt and cook until the seasonings are fragrant.

7-8 cups of liquid with 1lb pasta
TURN DOWN THE HEAT and empty the can of tomato sauce and continue to cook until the pasta has soaked up a lot of the sauce and it's slightly reduced and darker red in color. (I forgot to get a picture of this step!  It was splattering all over on me and I got distracted.)

Pour in the chicken broth, stir, and bring up to a boil (add the meat balls now if using).

For the meatballs I put 1 chicken breast cut up in my food processor and ground it then pulsed in some garlic, basil, oregano, dried minced onion, and pepper.  Rolled it in small spoon-sized balls and put them in the soup while it was simmering.
Almost Done!

Simmer until the noodles are tender and the meat balls are finished cooking, if you added them. 

Let the pasta thicken the soup/sauce until it's nice and thick.  There will be very little liquid left when the soup is finished.

Time to eat!
Serve with shredded cheese on top and maybe a dollop of sour cream - yum!


To make this taste closer to spaghetti O's puree some cooked carrot into the sauce - gives it the flavor you maybe looking for from the commercial product ;-)

Recap of the recipe all together...

Ingredients:

Olive Oil
Small Pasta Shapes (alphabet letters, O's, small shells, elbows, etc)
garlic powder - 1 tsp - to taste
minced onion - 1 Tbsp - to taste
basil - tsp or so - to taste
black pepper - few turns of a grinder to taste
dash of salt
1 can tomato sauce (15oz)
4 - 6 cups chicken broth (or bouillon and water)
Shredded cheese for serving

Optional:
Make mini spoon-sized meat balls and cook in the soup until cooked through for an extra boost of protein.

Directions:
Get out a heavy bottomed sauce pan and heat on medium.  Add in the olive oil until it's shimmery and then add the dry pasta - yes, dry.  Toast it in the hot oil until it's nicely browned all over.  It's kind of like starting to make a rice pilaf.

Once the pasta is nice and toasted, add in the seasonings - garlic, onion, basil, pepper and salt and cook until the seasonings are fragrant.

TURN DOWN THE HEAT and empty the can of tomato sauce and continue to cook until the pasta has soaked up a lot of the sauce and it's slightly reduced and darker red in color.

Pour in the chicken broth, stir, and bring up to a boil (add the meat balls now if using).  Simmer until the noodles are finished cooking through and the meat balls are finished, if you added them).

Serve with shredded cheese on top and maybe a dollop of sour cream - yum!


Disclaimer: I am an Amazon Affiliate and get a small donation to the blog through clicks and sales of the Amazon links.

New Fangled Foundation Rows: Single-Crochet Foundation/Double Chain Foundation Row

New Fangled Foundation Row:

 Double Chain Foundation Row & Single-Crochet Stitch Foundation Row


Usually when beginning a crochet project a single chain stitch is used - it's the most basic stitch of looping the yarn through the loops to create a, well, chain ;-).  It's slightly stretchy - until you work back into it, then it's sturdy - but when you don't want a sturdy edge and want a nice stretchy one, you need a different edge stitch.  

Two different stitches I use for a stretchier foundation row are the double chain stitch and the single-crochet stitch foundation row.

A double chain stitch creates what looks like a chain stitch with an open loop above for working the next row.  It's decorative, stretchy, the base looks neat and tidy, and it's easy to work back into.  I love using it as the base for hats - either knitted or crocheted or the bottom of a sweater, shirt or dress.


A single-crochet stitch foundation row is ultra stretchy - good for keeping lots of stretch in the base of the work - or for making sure the base isn't smaller than the top of the work once it is finished.  This also works very well for working in the round. The single-crochet stitch foundation looks just like a single crochet and a chain row but it is all worked at once.  


Best of all for both of these stitches, the work will look the same on both the top edge and bottom edge - no more loopy edge on the foundation row!


For the beginning of the double chain stitch first chain 2.  Then in the first chain that was made, go and pull up a loop.  Finish the single crochet (yarn over, pull through two loops).  For the next stitch, *insert the hook in the left part of the single crochet stitch, yarn over and pull up a loop.  Now there should be two loops on the hook.  Finish the single crochet by yarning over and pulling through these two loops.*  Continue working the directions that are between the *s to make the double chain stitch as long as needed.

To use it as the foundation row, simply work back into the top loops with your chosen stitch.

For the single-crochet stitch foundation row again, chain two.  Insert the hook in the first chain stitch (next to the knot) yarn over and pull up a loop.  Yarn over again and pull through just 1 loop.  Yarn over and pull through two to complete the first single-crochet foundation stitch.  For the next stitch, look on the left side of the work - there are what looks like 2 chain stitches here.  Go into the bottom of the two (again, closest to the knot) yarn over, and pull up a loop.  Yarn over again and pull through 1 loop.  Yarn over and pull through two loops to complete.

Wednesday, September 3, 2014

Pom-Poms


Fancy Pom-Poms


Have you ever seen fancy or decorative pom-poms?  The little balls of fluffy yarn that mysteriously have pictures or designs wrapped right in them... How do they do that?!?

With the help from a little online digging and lots of experimentation, I figured it out!

First of all, I made a quick trip to my craft store to pick up some pom pom makers - after doing some research on what looked best to buy.  I've had ones that are full complete circles and some that are partial circles - I didn't like either of them.  I made some that were heavy cardboard that worked pretty well, but I couldn't easily cut out small enough ones to use for making lots of poms without wasting too much yarn - yes I have tons of yarn, but you know, it's the principle of the thing.  Anyway, I picked up a pack of each of these:
   2 large pom pom makers   2 small pom pom makers

They work great and are very easy to use and to cut and tie when you are finished wrapping the pom pom.

Anyway, enough with the promotions of cool products (btw, I am an Amazon affiliate and I get a small donation to the blog if you make a purchase through a link posted here.)

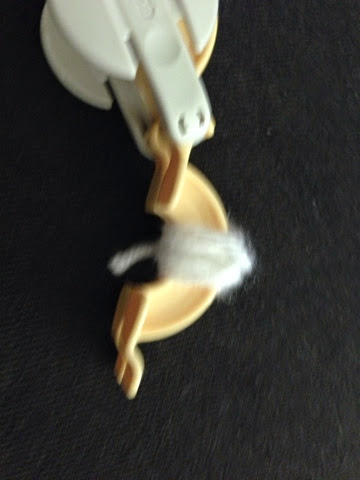
Let's do an easy one and create a bulls-eye pom pom.  Start first by taking your pom pom maker and on just one half, only in the middle, wrap several wraps with your center color.  Wrap tightly to fit as many wraps as you can in only a small space.


Cover the center wraps with the 2nd color, then with the first color again.

Finishing with a layer of the 2nd color to finish off and fill the rest of that side of the loom.

Repeat with the other side of the loom, or wrap the other side in one solid color to keep the design on one half of the pom pom.

Now, get out some very sharp scissors and cut down the groove on each half of the ball.

Don't forget to tie it tightly through the center!  The groove is fairly easy to slip some yarn through - but remember to pull tight!

Once it's all tied up, the pom pom can be removed from the pom pom maker

You are left with an oddly shaped poofy pom pom - not to worry - there's one more step.  TRIMMING!!

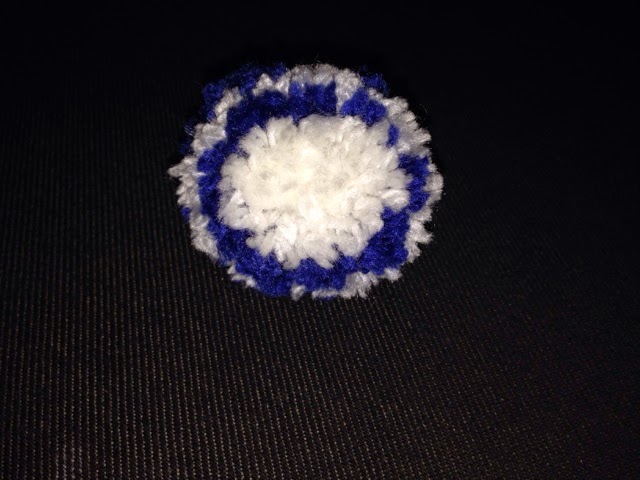
Trim that pom pom until it's nice and round and even.  (see photo below) Ta Da!

Now go forth and make some fancy pom poms.  As I get some more fancy ones made I'll post some more pictures.

Friday, August 29, 2014

Finger Knitting 101

Finger Knitting 101


Finger knitting makes a flat bit of knitting 4 stitches wide.  Similar to knitting on a peg knitting loom or knitting board.  You need no special equipment to finger knit - just your hands and a ball of yarn.  Chunky yarn works best, but worsted weight works too - especially with smaller fingers.

First, start out with a slip knot loop.

(Enjoy the GIF - it took me HOURS to get it to work!)

Place this loop on the little finger of your non-dominate hand.  I write with my right hand, so my non-dominate hand is my left - this is the hand where I put my knitting.


Wrap BEHIND your ring finger, in front of your middle finger, behind the index finger and around,


back behind the middle finger, in front of the ring finger, and behind the little finger and back to the front.  This will weave the yarn around your fingers to begin your base row of knitting.


Bring the end of the yarn across your fingers above where your fingers are wrapped (in my case from right to left).  My yarn here is pictured below the loops on my fingers - be sure yours is above.


Pull up the loop of yarn on the little finger and bring it over your finger - being sure to keep the yarn that's across your fingers still on your finger.


Do the same with the ring finger, middle and index finger.  Congrats!  You've just completed your first row of knitting.

Now, bring the yarn back across your hand from index finger to little finger (left to right) and repeat the looping.  The yarn is now leading from your index finger; be sure to start with the finger the yarn is coming from with your looping.


Continue back and forth across the four fingers to create the finger knit chain.

If you need to save it for later, just weave a marker or pen in and out of the stitches to hold your knitting.  I suggest putting the yarn and the marker in a cup to hold them upright so the stitches don't slip off.

Thanks to my daughter for being a hand model!

See Finger Knitting: Binding Off to find out how to end your work.

Look for the tutorial on how to weave your finger knitting into exciting projects - coasters, trivets, blankets... so many possibilities.

Monday, August 18, 2014

Kool-Aid Dying

Kool-Aid Dying


Ever used Kool-Aid to dye wool?  It's a really fun project for kids and adults to do together.  You can even use a crocpot - or microwave, or stovetop.  Drink mix is food safe, so you can use your regular pots to dye instead of having a set aside dye pot used only for caustic dyes.  I like to use Lion Brand Fisherman's Wool, but any undyed wool yarn should do nicely.

I use:
A good sized pot
Water
Splash of Vinegar
Lion Brand Fisherman's Wool
Kool-Aid in your choice of color(s) 

1) Either wind the yarn into a looped skein or into a loose ball or cake.  Fully saturate the yarn with water that is approximately the same temperature as the wool.  You don't want it to felt on you!

2) Once the yarn is fully wet all the way through (it may need to soak for a while) remove it from the pot and gently squeeze to get out the excess, again, be careful not to agitate it.  Fill the pot with water and a splash of vinegar and add in your packet(s) of kool-aid and stir.  Mix a couple of colors, or go for just one.

3) Submerge your yarn carefully as to not splash the color everywhere (ask me how I know!).  Gently bring the yarn and dye up to a simmer - not a boil.

4) Simmer your yarn in the dye bath until the water turns clear.  Yes, the water will be CLEAR once all the dye is soaked into your yarn.


  • If you are using the microwave, zap the wool in 1 minute increments until the water turns clear
5) Let the yarn cool until it's cool enough to handle comfortably.  Rinse the yarn in the same temperature water as the yarn (you don't want to shock the yarn from hot to cold or vice versa or you'll end up with a felted mess).  Rinse and squeeze until the water is clear.

6) Gently press your dyed yarn between a couple of towels to get as much water out as possible.  Hang the skein to dry above a sink, or let the cake dry on a stack of dry towels or on a drying screen (keep turning every few hours to help it dry out).

Notes:

  • If the yarn is wound into a looped skein it will have a fairly even dye.  When you wrap into a skein be sure to tie it in at least 4 places loosely, then twist and tuck one end into the other to keep it from becoming a mess in the water pot.
  • If the yarn is in a cake or ball the center of the ball will be a lighter dyed color than the outside of the ball creating a variegated ball.

Play with using a couple pots of water and dying half the yarn skein (looped and tied but not twisted) in one pot and one end in the other.

The yarn below was dyed in a cake to create the variations in color, then knit into the sleeveless sweater.


Happy Dying!! :-D